
If you are anything like me, you probably have hours upon hours of videos of your kids doing things like eating baby food or running back and forth (and back and forth) at their youth soccer game … And while at the time you initially filmed those moments, it seemed like the most interesting thing in the world…months later, you find yourself wondering why on earth you have a 3 minute video of your baby sleeping!?!?
When our first child was turning 1, I decided to make a montage of the best moments of her first year. As I begun to filter through the hundreds of clips I had of her, I realized I didn’t want (or need) the amount of video footage I had collected that year. I selected the best moment (smile, laugh, highlight) of each video and in chronological order, complied it into one 4 minute video to a specially selected song. And then…I deleted alllll the originals.
I was so proud of that video and probably watched it 50 times in a week span, crying each time! There is just something that gets the tears flowing when you pair a video clip to meaningful music. I realized after making that first movie for her that I wanted to continue to do it every year for each child we have. Now, I know this sounds like a laborious, tedious task but let me assure you that this is super easy and you can do this too! And the best part is you don’t need to transfer any files to a computer. You can create the film right on your phone!
I create the films in the iMovie app which is a very user friendly program. Here are the step by step instructions on how I make the montage films.
1. Download the iMovie app if you don’t already have it. It should come preloaded on your iPhone. (If you dont have an iPhone, there are other video editing program available to you. I just don’t have any experience with those…so sorry!)
2. You will have the option to select “Movie” or “Trailer” and you want to choose Movie.
3. It will then take you to your photo/video library. This will take some time to scroll through and select all the files you want to add. Since I make these for their birthday’s, I start by finding the date right after their last birthday and working my way to their present time. Once you have selected everything you want to import, press “create movie” and the bottom of the screen.
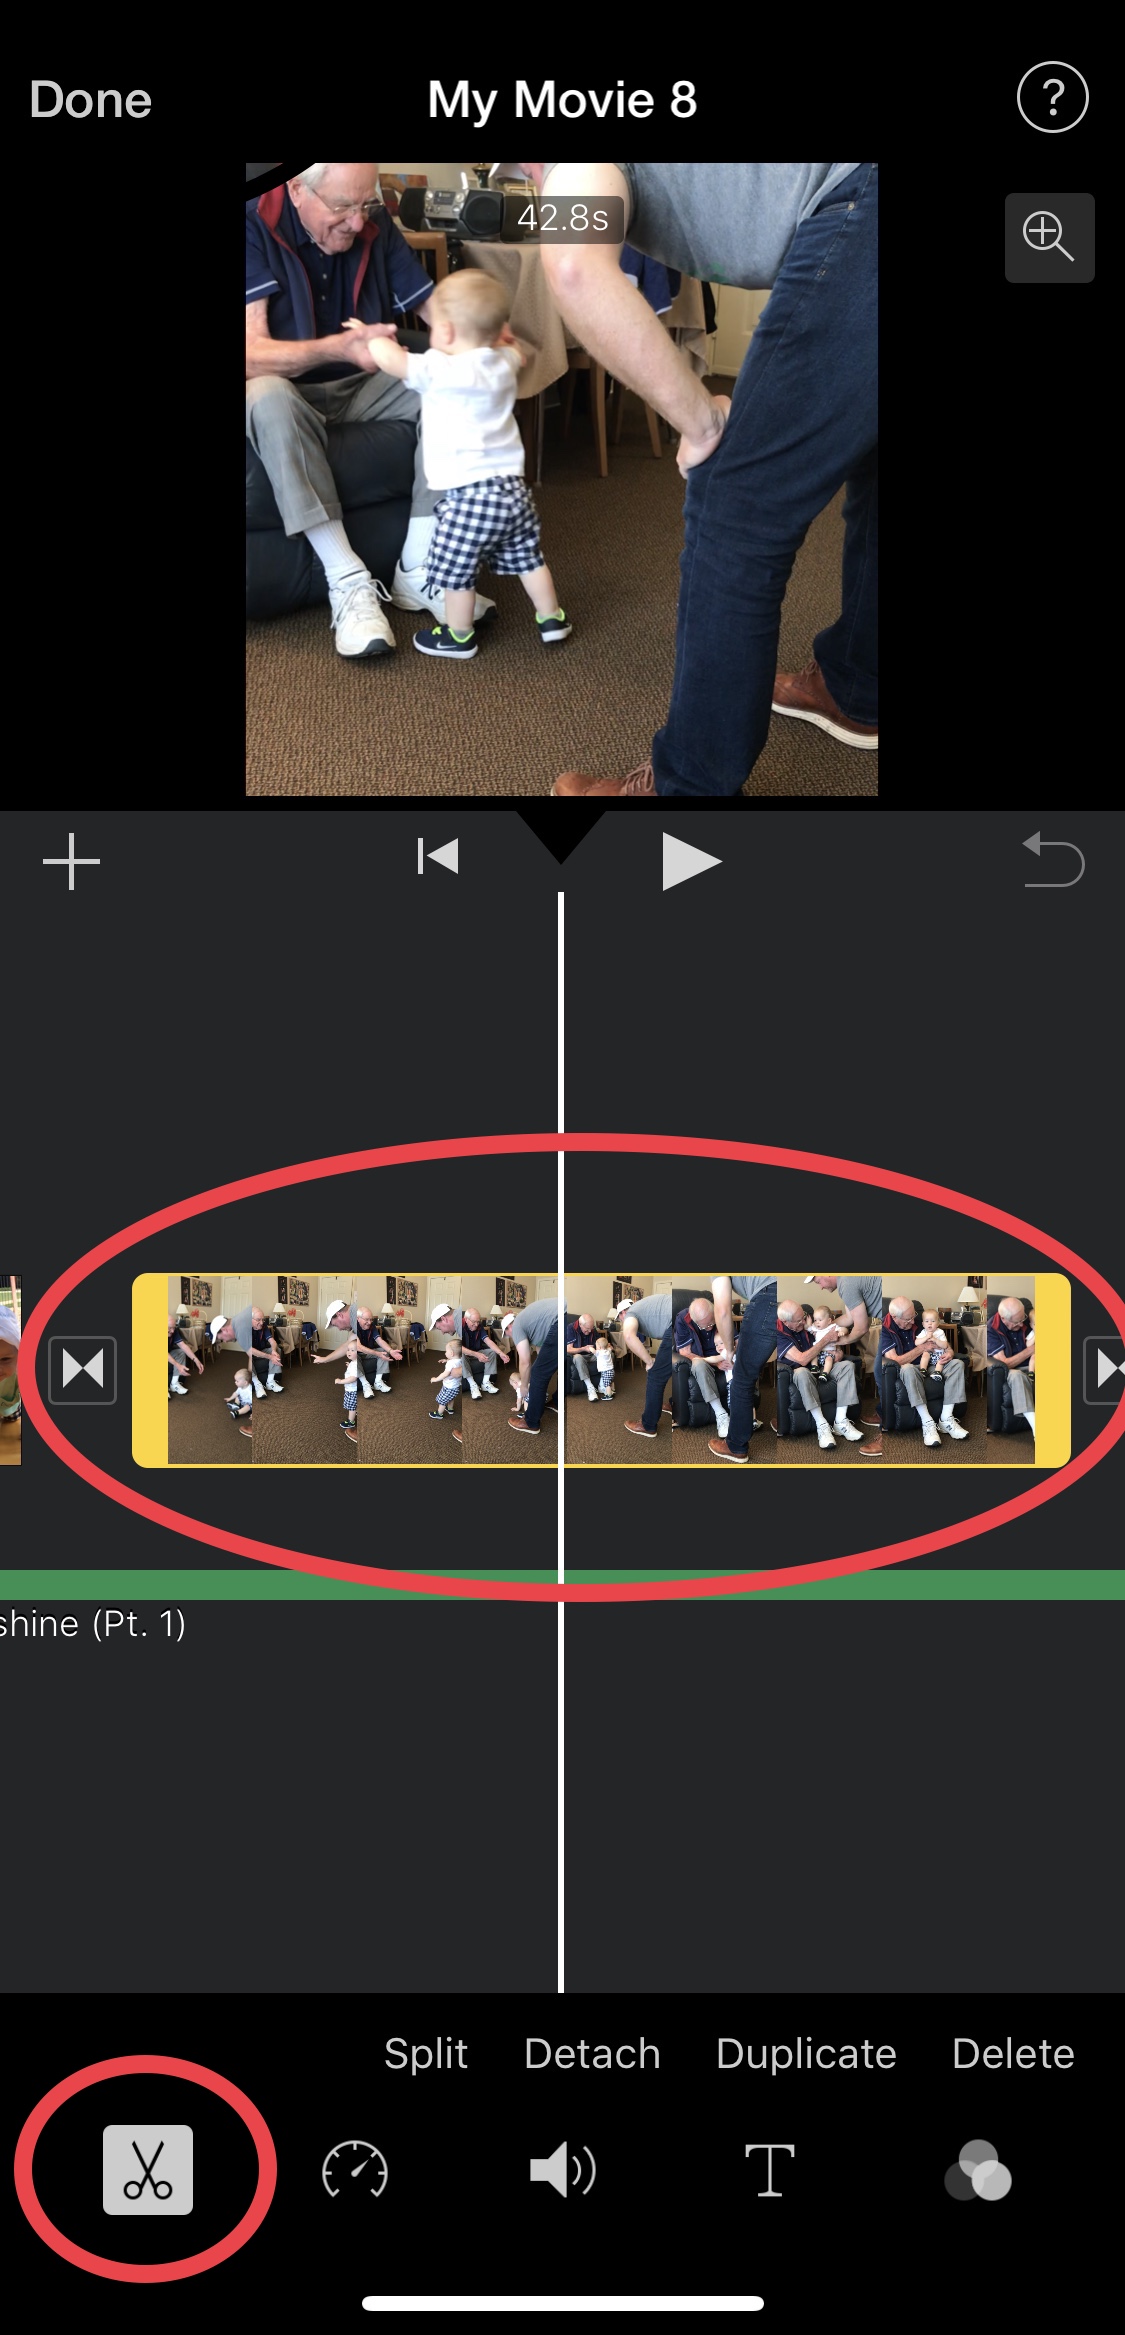
4. Trimming your video files. At this point, you will need to view each video file and cut It down to the piece you want to keep. You will do this by selecting each file (it will be illuminated with a yellow border) and then pressing the scissor icon at the bottom of the screen. You will condense the file by moving your finger to the right or left until you get the portion you want to use.
This is by far the most tedious part of making these movies but look at it this way: you will never again have to sit through the hours of footage again like you would otherwise if you decided to keep alllll those original files. I like to keep my movies to about 4-6 minutes (the length of a song or two) and have found that 3 seconds is the average time I have for each clip. This will obviously vary depending on how many files you are working with and if you want to make the movie longer by adding additional songs for the background. Don’t feel like you have to do all of this in one sitting. IMovie automatically saves wherever you are so you can stop at any point and come back later to resume you work.
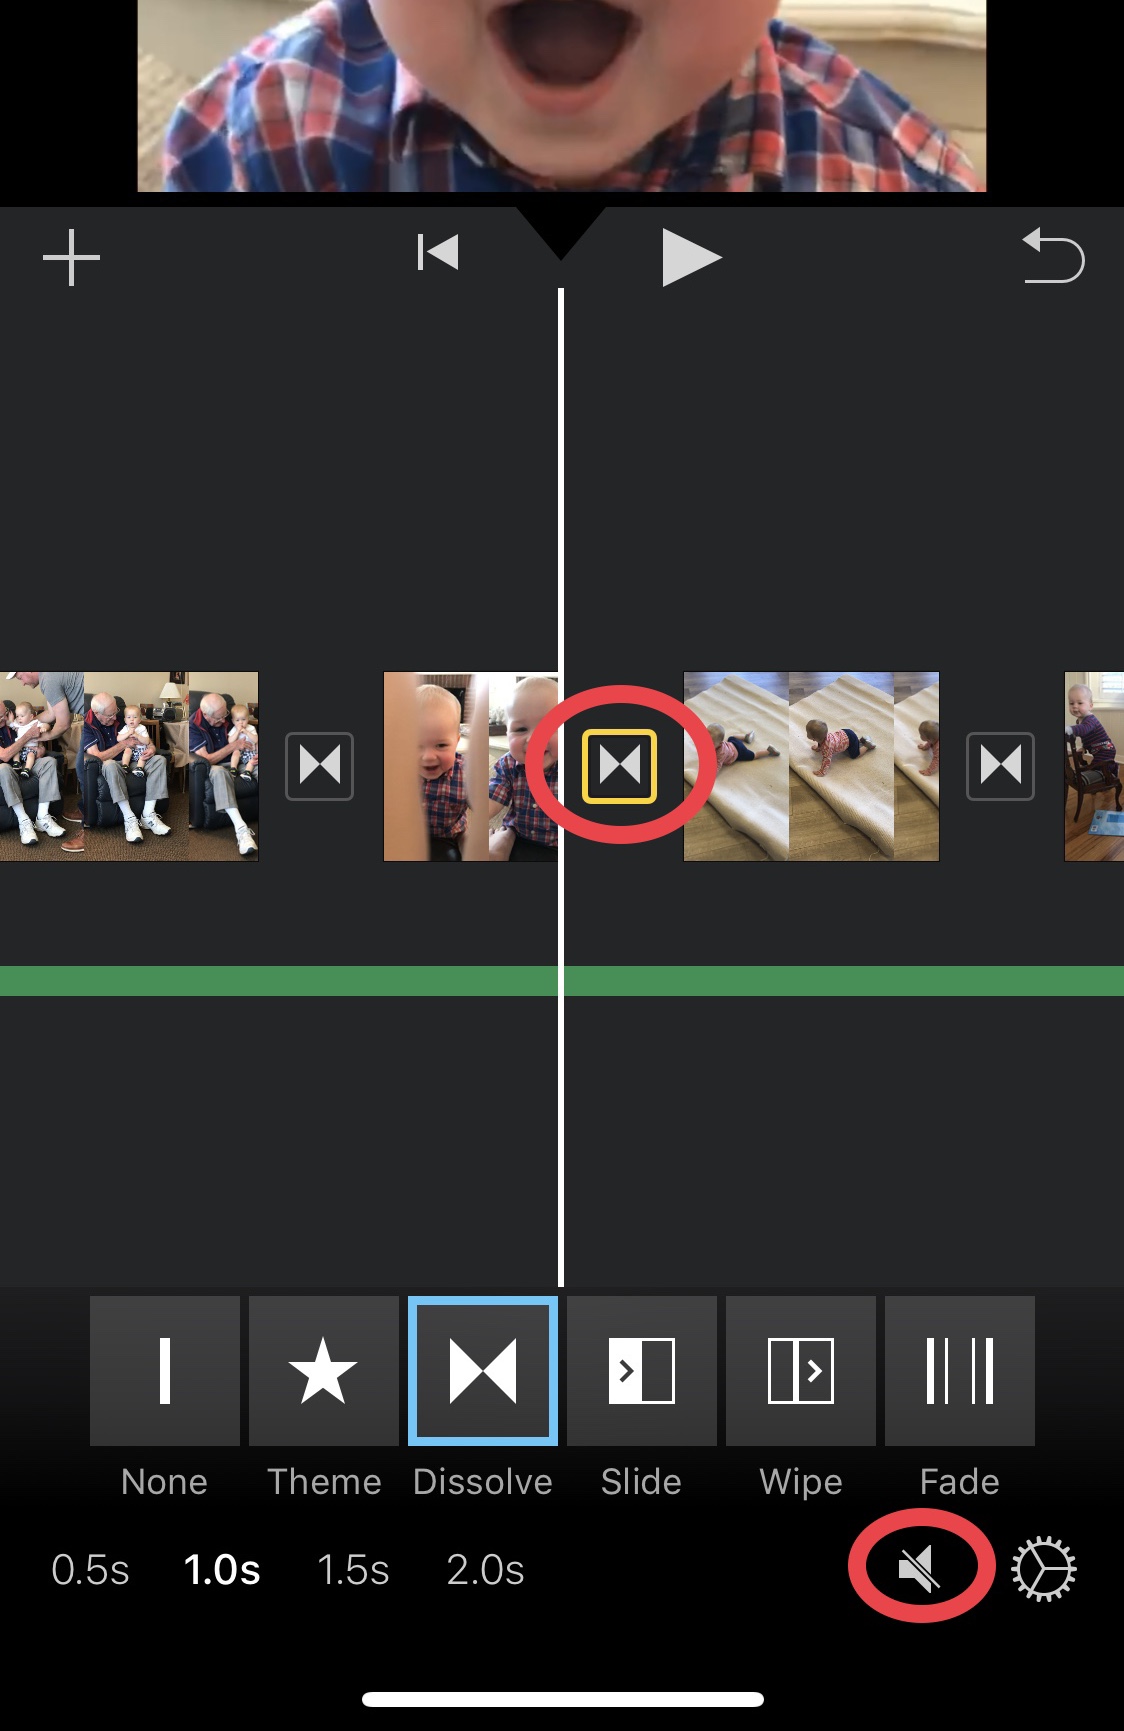
5. Transitions. Your movie will automatically default to the dissolve feature but you can change it to slide, wipe or fade. I personally like the dissolve. You also want to make sure that the volume is off on the transitions…otherwise you will have a nice “SWOOSH” sound between each clip 😉

6. Audio. As I’ve mentioned, I like to add music to my movie’s and intentionally select a song that is meaningful to the child. For example: I chose the lullaby I sang to my son as the background music for his first birthday movie. Since there is music playing, this means you need to mute the audio on the clips. You do this by selecting each video file (it will be illuminated in yellow), pressing the volume image at the bottom of the screen and dragging the sound bar all the way down to 0. If there is a certain clip you want to hear the audio on, leave it as is and once you add in your background music, you can go in and adjust the volume accordingly (I’ll address that in bit).
7. Text. I don’t use much text except for maybe the beginning and end of the clip to label which year the montage is for but it can very easily be added onto a video file/photo or just on a black screen. (to add a black screen, you will need to take a screen shot of a black background (you can find one via google) and then add it into the movie. I like the Line/Title or Standard options for their clean look.
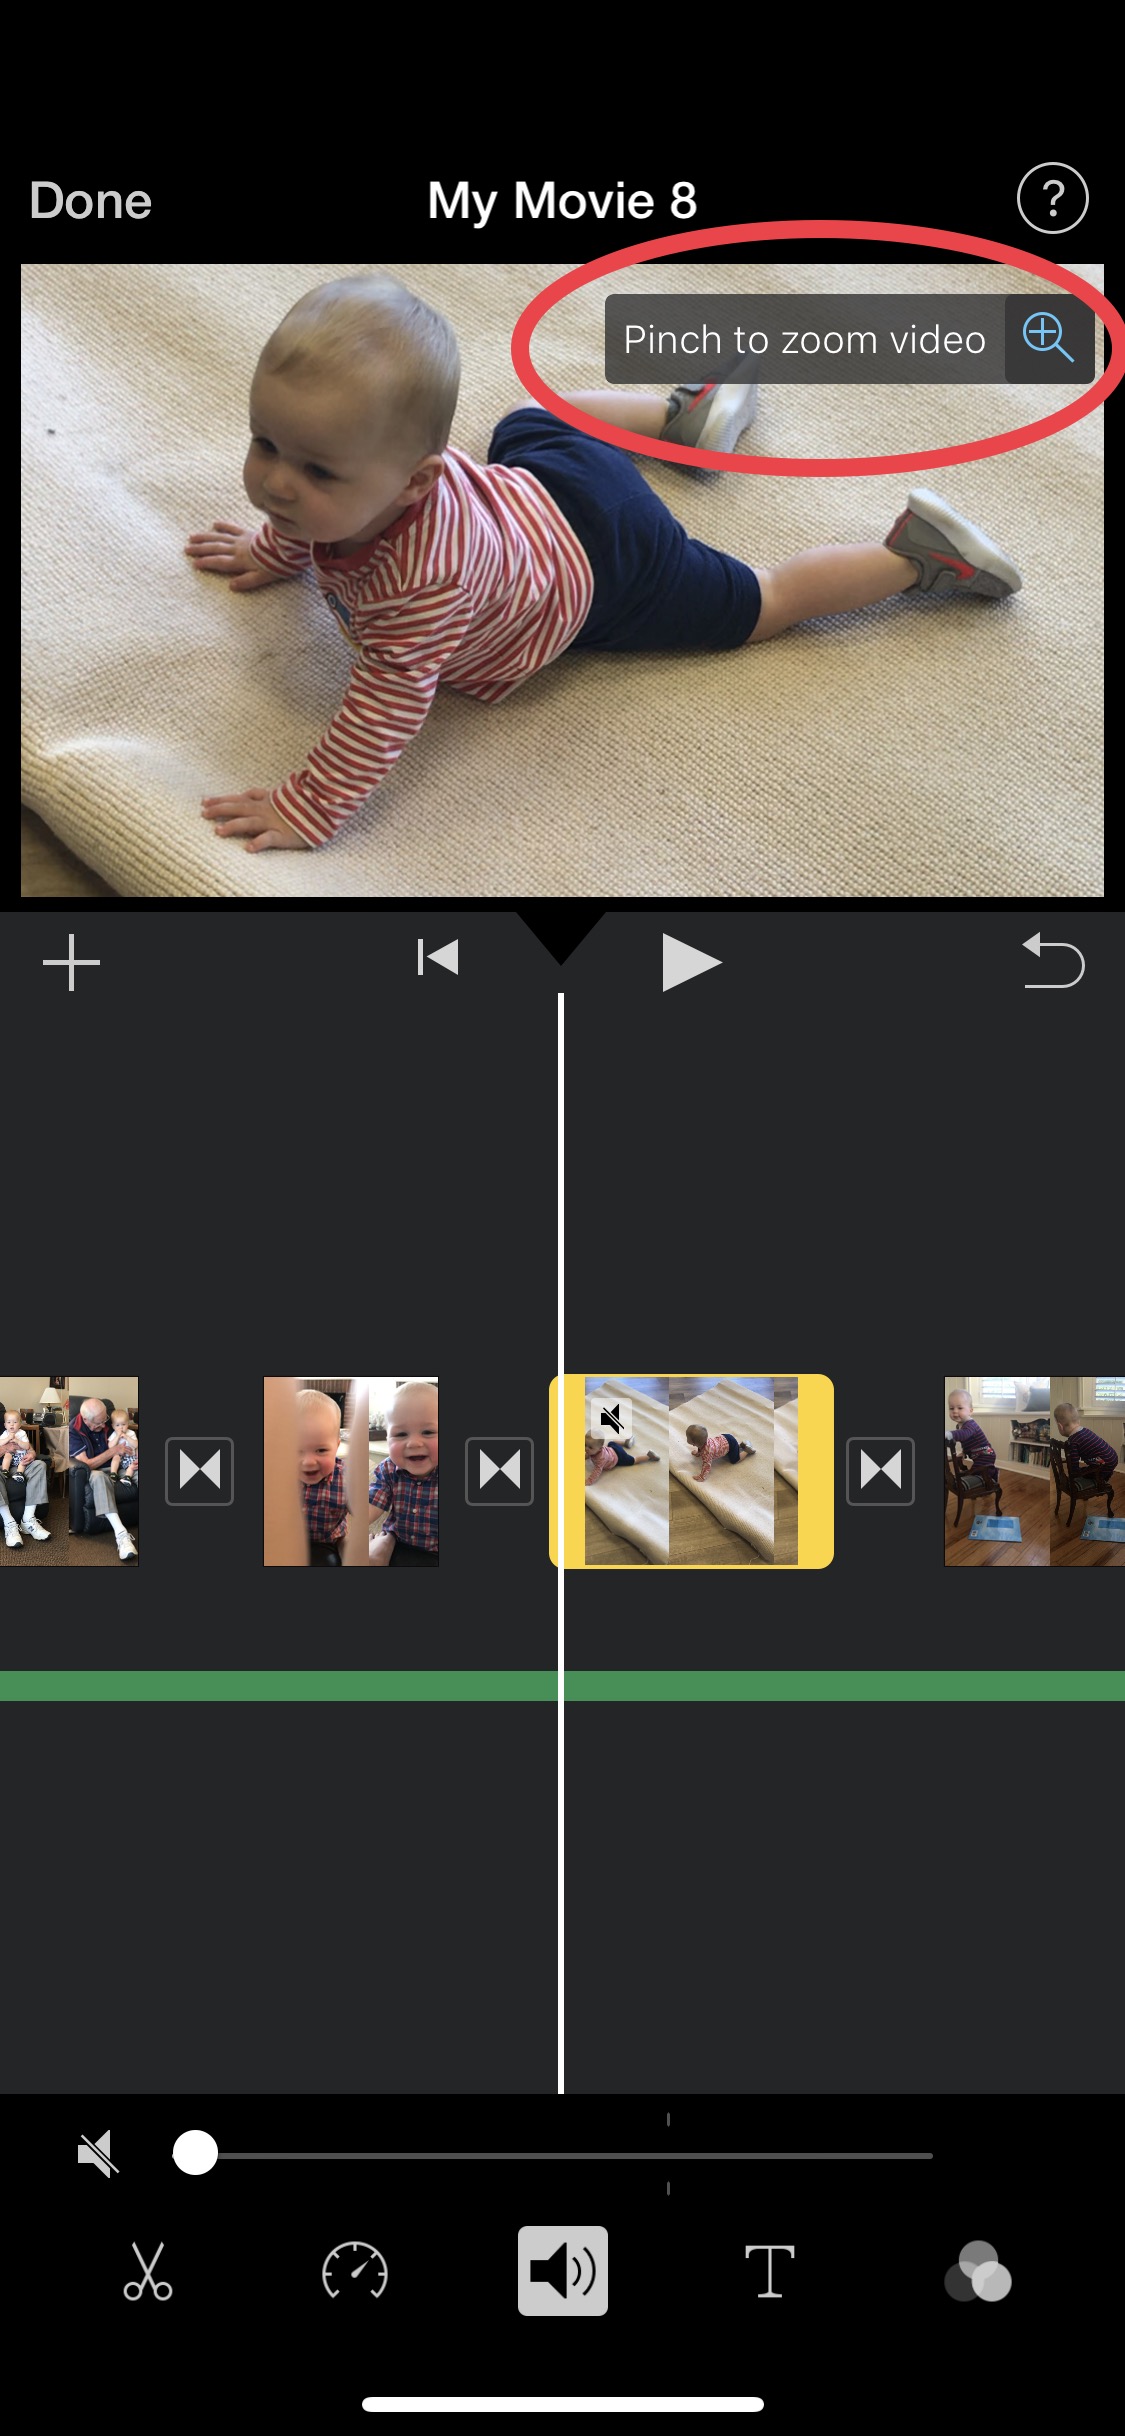
8. Zooming in on the portion of the video you want to see. Every time I make one of these, I promise myself that I will always film horizontally with my phone…but the reality is, I almost always film vertically. iMovie is set up to be most compatibie with landscape files but you can certainly use your portrait filmed files…you may just need to zoom in a bit to see exactly what you are wanting to. This can be done by selecting the file and then pressing the magnifying glass in the top right corner. Once you have selected it the words ‘pinch to zoom video’ will appear. At this point you can move the video around or zoom in. Often time a head will be cut off and this will allow you to fix that.
9. Adding music. When you are ready to add your music,
-select the + sign on the left side of the screen
-press audio
-press songs
-search the song in your iTunes library you want to add
-select use
Now that you have added the music to you movie, you can do things like fade in and out the music at the begininning and end or reduce it for the clips you want to hear the audio on. To do this, select the music file (it will be illuminated with a yellow border) and then select the scissor icon. At this point, you will want to SPLIT the music file at the beginning and end of the video clip you are wanting to hear the audio for. Once you have done that, decrease the music to around 25-40% (you can play around with this to get the right balance) and then ensure that the volume on the video file is at 100% or louder. Again, this will take some tweaking to get the right balance.
10. You’re almost done! Now, to save your video, head back to the home screen and select the little button that looks like a square with the arrow pointing up. At this point you can either upload to YouTube, Vimeo or any other video sharing website you use. I always select “save video” so it will save to my photo library as well as my iMovie library. I recommend saving it in HD or as large of a file as possible so its the best quality.
That’s it! You did it! Now you can begin to process of cleaning out old video files from your photo library and enjoy your succent 5 minute highlight reel of your precious little one. MAKE SURE YOU SAVE YOUR VIDEO TO A RELIABLE LOCATION LIKE AN EXTERNAL HARD DRIVE OR PUBLISH IT TO YOUTUBE/VIMEO BEFORE DELETING ORIGINAL FILES.
My oldest turned three this year and she wanted to watch her movie over and over again. I know this is something my kids will look forward to and hopefully treasure as they grow.
Feel free to reach out with any questions and I will be more than happy to help as best I can! You can do it!
Now, here is an example of mine if you need some inspiration or a starting point as to what it could look like.
Blaire